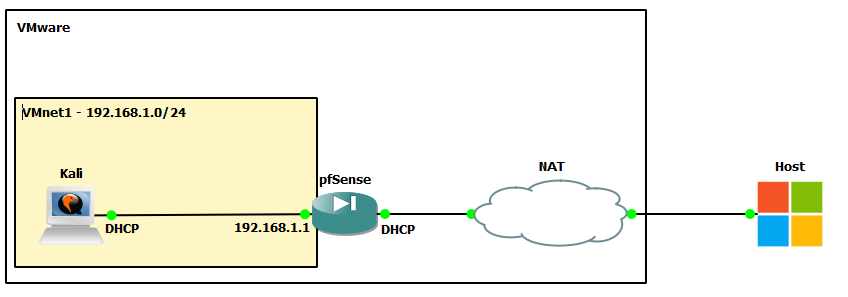
Setting up a virtual lab in VMware with pfSense as a gateway
The guide will run you through the process of setting up a very basic virtual lab in VMware using pfSense as a gateway/firewall to the WAN.
Lab setup
I have downloaded the following software:
- VMware Workstation Pro 17 (licence fee can vary, please check your regional site) - click here.
- A Kali WMware image directly from the Kali website - click here.
- A pfSense ISO directly from the pfSense website - click here.
- 7zip to extract the Kali VM and pfSense ISO - click here.
Building the lab
First, install VMware Workstation Pro accepting the defaults. Note: it is always worth checking through the optional features you are installing for a greater understanding of what you are putting onto your machine. Once installed, extract both your Kali and pfSense ISO. Load up VMware and select Edit > Virtual Network Editor. This is an optional step, but I recommend creating virtual networks as a way to organise your labs. Click 'Change Settings' and add a new network. In the screen above I have created a new network 'VMnet1' which is 'Host-only' (this will be our LAN side of the pfSense VM).
The subnet I have given it is 192.168.1.0/24. I've left the settings in the screenshot so you can see exactly how it is setup.
This is an optional step, but I recommend creating virtual networks as a way to organise your labs. Click 'Change Settings' and add a new network. In the screen above I have created a new network 'VMnet1' which is 'Host-only' (this will be our LAN side of the pfSense VM).
The subnet I have given it is 192.168.1.0/24. I've left the settings in the screenshot so you can see exactly how it is setup.
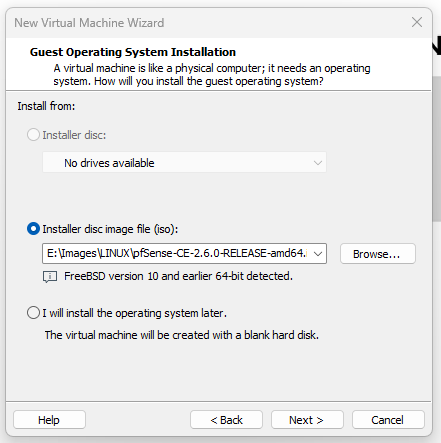
 Next is to create our VMs - the Kali VM and pfSense. To do this click 'Create a New Virtual Machine' (if you cannot see that option simply click File > New Virtual Machine...). Click next and select the pfSense ISO:
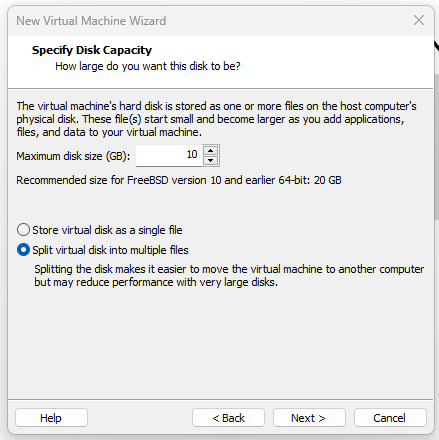
 I gave my pfSense VM 10gb of disk space (which is more than enough unless you are planning on installing plugins):
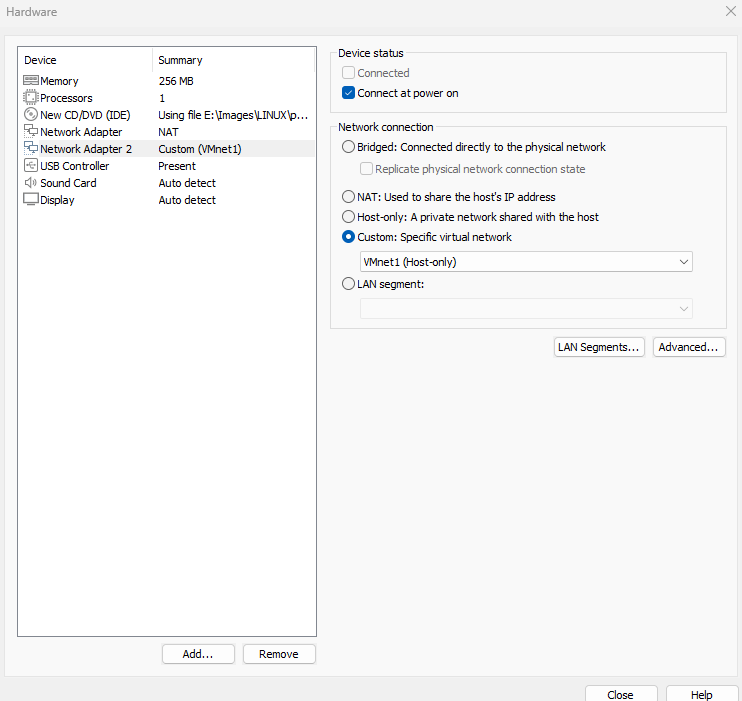
 When you are asked to customise its hardware, click the customise option and add an additional network adapter. We want to set our pfSense VM up with a LAN and WAN side (hence 2 adapters). The LAN side will be in the same subnet as our Kali VM, with the WAN
side being on the external side (NAT). See the screen below for my settings:
When you are asked to customise its hardware, click the customise option and add an additional network adapter. We want to set our pfSense VM up with a LAN and WAN side (hence 2 adapters). The LAN side will be in the same subnet as our Kali VM, with the WAN
side being on the external side (NAT). See the screen below for my settings:
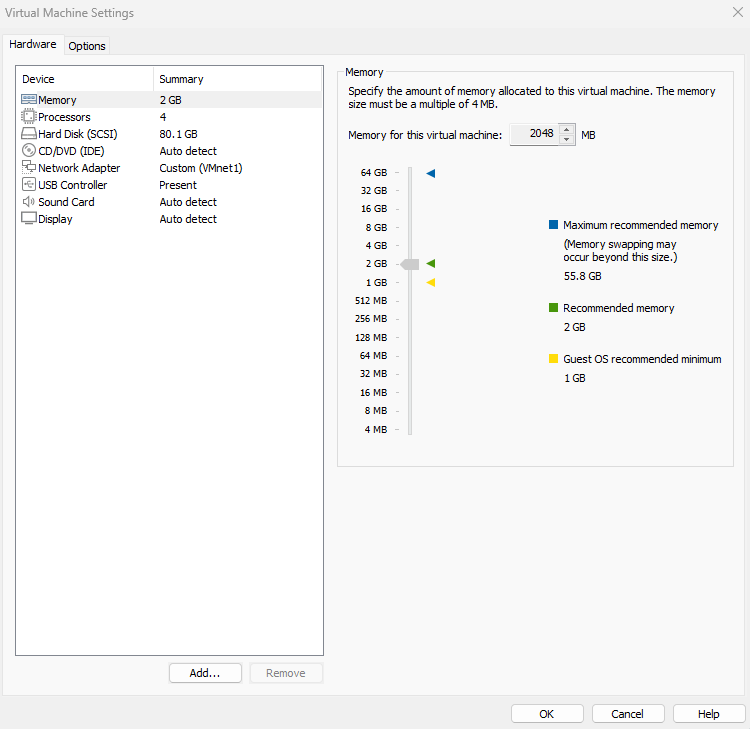
 Finialise and create the VM. Finally, create the Kali VM and set its network adapter to 'VMnet1' also. Here are my Kali VM settings:
 This is what I currently now have in my VMware:
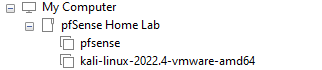 If this looks slightly different to yours, do not worry. All I have done is created a folder (right click > New Folder) and dragged my VMs into it to organise my VMware.
Configuring the lab
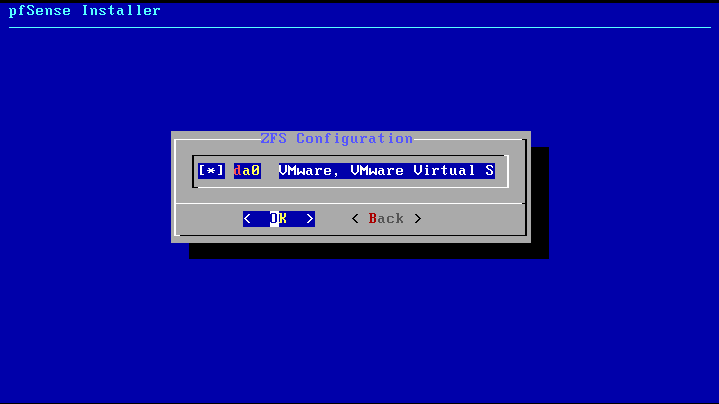
We can now start configuring the two VMs. Boot up your pfSense VM first: Use the defaults in first few options. When you get to the below screen, press space to select the drive:
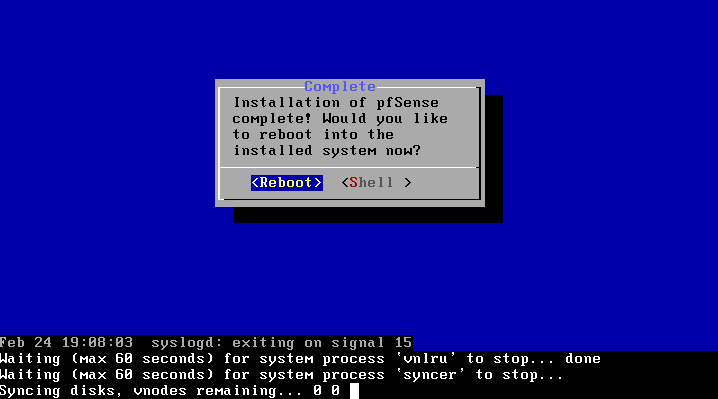
 Keep using the defaults in the next options and select reboot at the end:
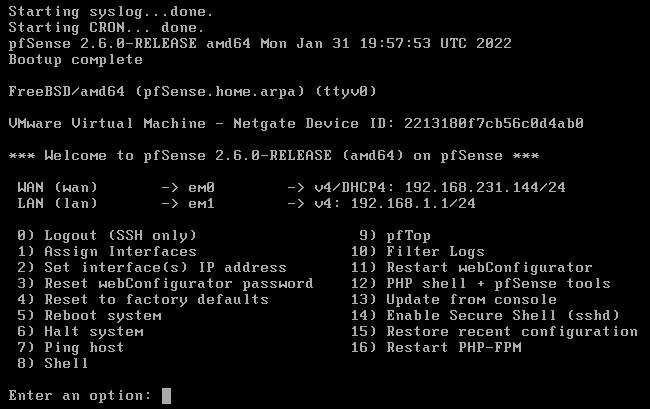
 Let the pfSense reboot and load. Once ready, you should be faced with a similar screen as below. Your WAN address will more than likely be different to mine, do not worry, all is still well. As long as you have DHCP and
an address on the WAN that's what matters. Your LAN will be set to 192.168.1.1/24, this is the default pfSense LAN address after a fresh install.
Let the pfSense reboot and load. Once ready, you should be faced with a similar screen as below. Your WAN address will more than likely be different to mine, do not worry, all is still well. As long as you have DHCP and
an address on the WAN that's what matters. Your LAN will be set to 192.168.1.1/24, this is the default pfSense LAN address after a fresh install.
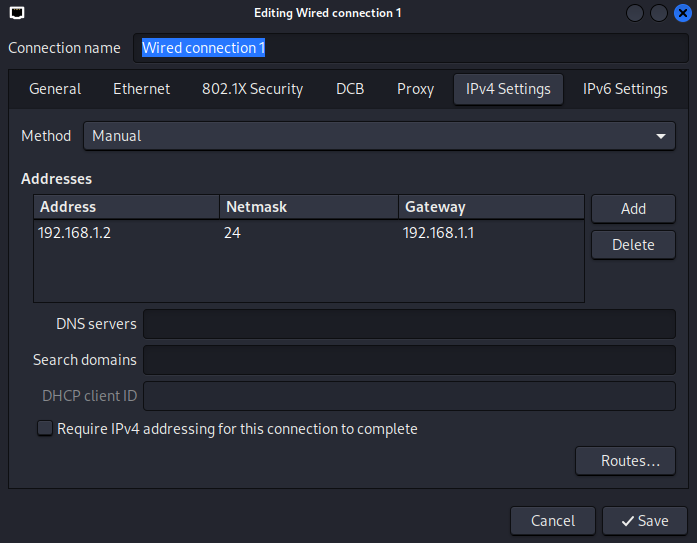
 We are now going to boot up the Kali VM. Once started, we need to statically IP address our Kali to 192.168.1.x/24. This is done so that we can access our pfSense LAN interface which is on 192.168.1.1/24. I've statically assigned my Kali
to 192.168.1.2/24:
We are now going to boot up the Kali VM. Once started, we need to statically IP address our Kali to 192.168.1.x/24. This is done so that we can access our pfSense LAN interface which is on 192.168.1.1/24. I've statically assigned my Kali
to 192.168.1.2/24:
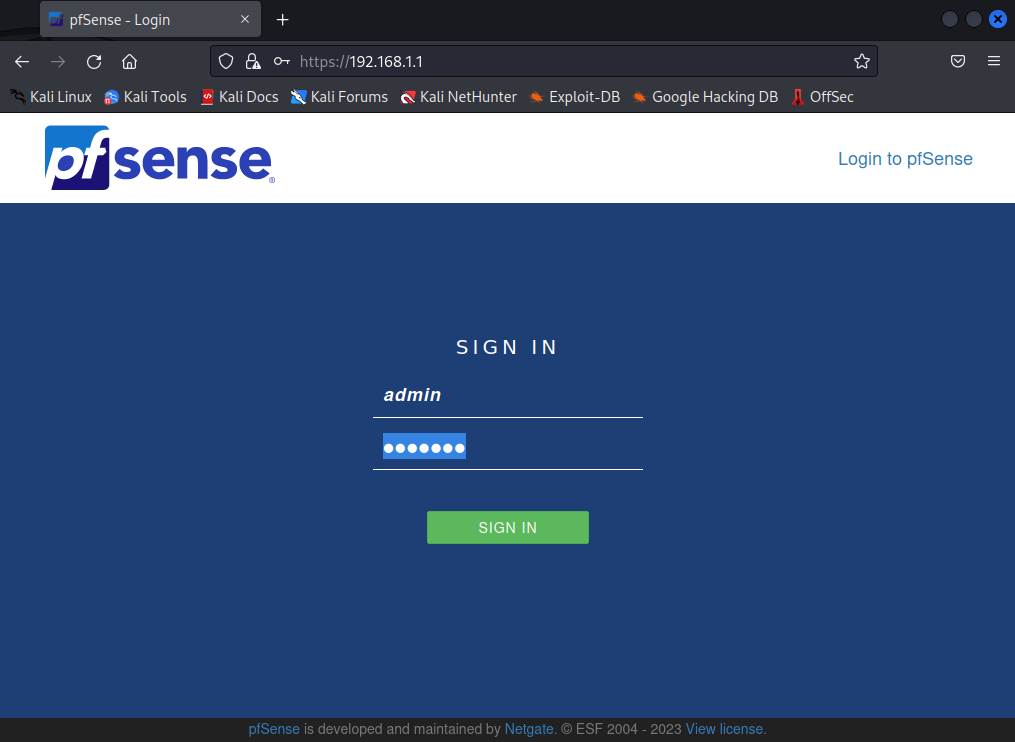
 I'd recommend turning your Kali network adapter on/off to ensure it picks up the static address. Once done, open Firefox and access the pfSense VM using its LAN IP:
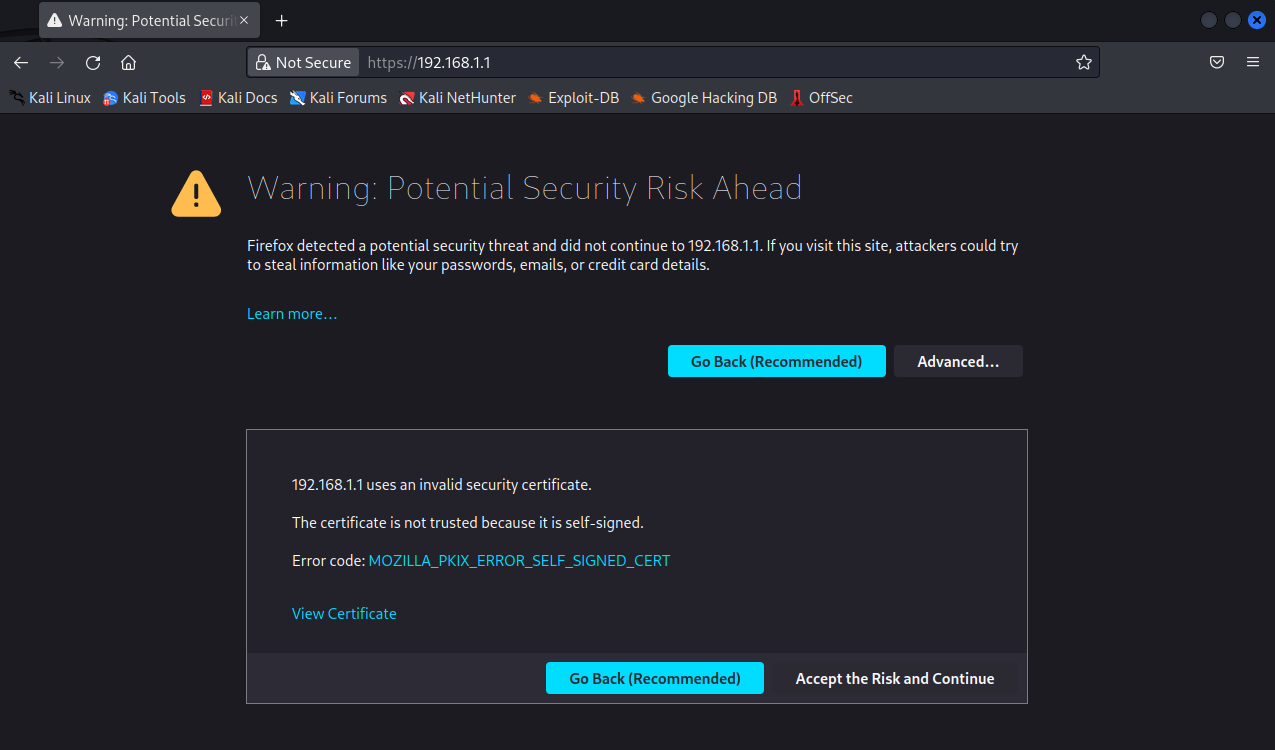 Click 'Advanced' and accept the risk. Login to pfSense using the default credentials of username: admin and password: pfsense.
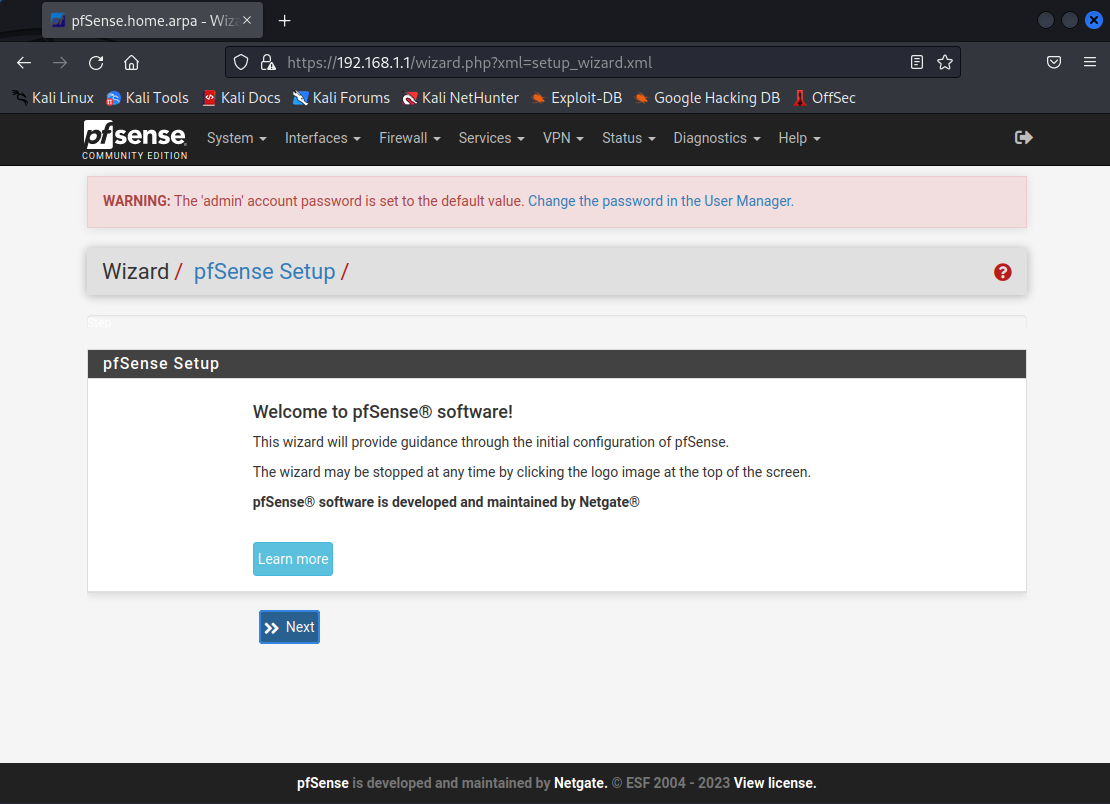
 The first time we login to pfSense we'll be asked to run through the wizard. Click 'Next' on step 1:
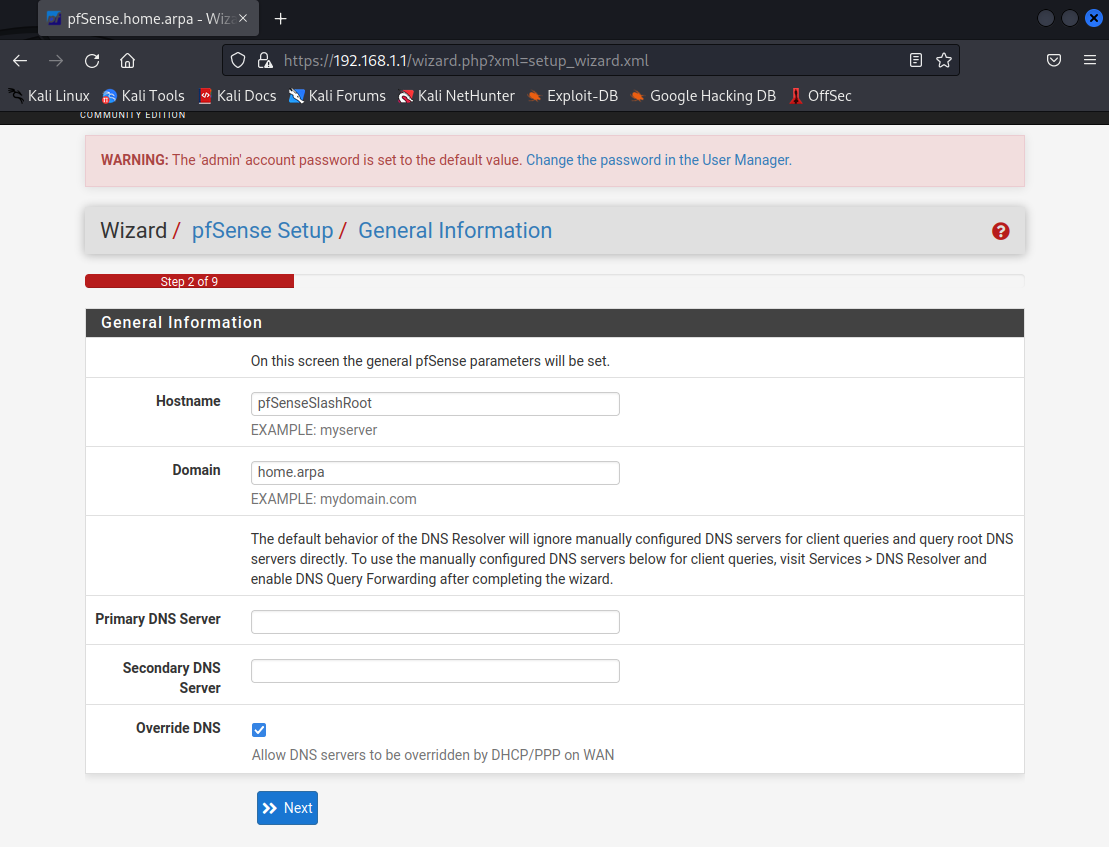
 On step 2 I've added a hostname, this is totally optional:
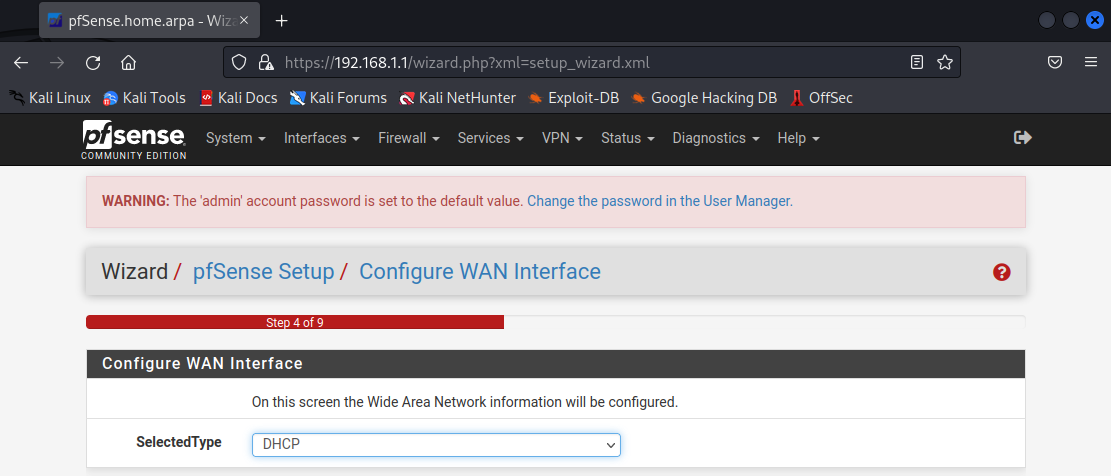
 Click through to step 4. On this step I have selected DHCP for my WAN interface i.e. it will be given an IP address from VMWare NAT service.
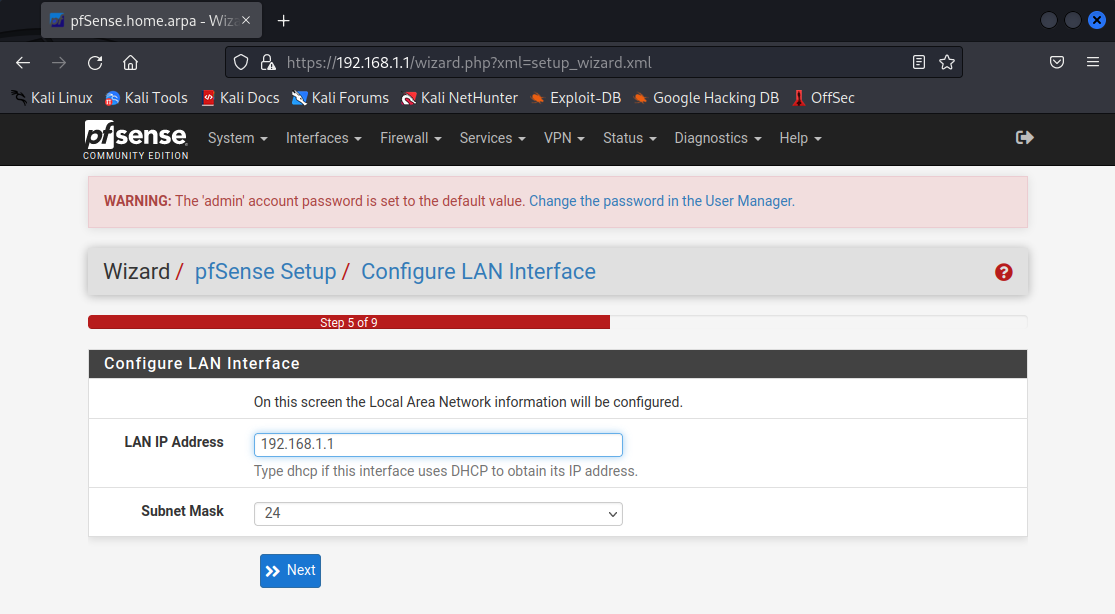
 Step 5 will ask you for a LAN interface address. I'm leaving mine as the default address I am currently using and connected to from my Kali VM. Point to note here, if you change this you'll also need to change your Kali IP to be on
the same subnet to re-access the pfSense web interface after it has been restarted following the wizard setup.
Step 5 will ask you for a LAN interface address. I'm leaving mine as the default address I am currently using and connected to from my Kali VM. Point to note here, if you change this you'll also need to change your Kali IP to be on
the same subnet to re-access the pfSense web interface after it has been restarted following the wizard setup.
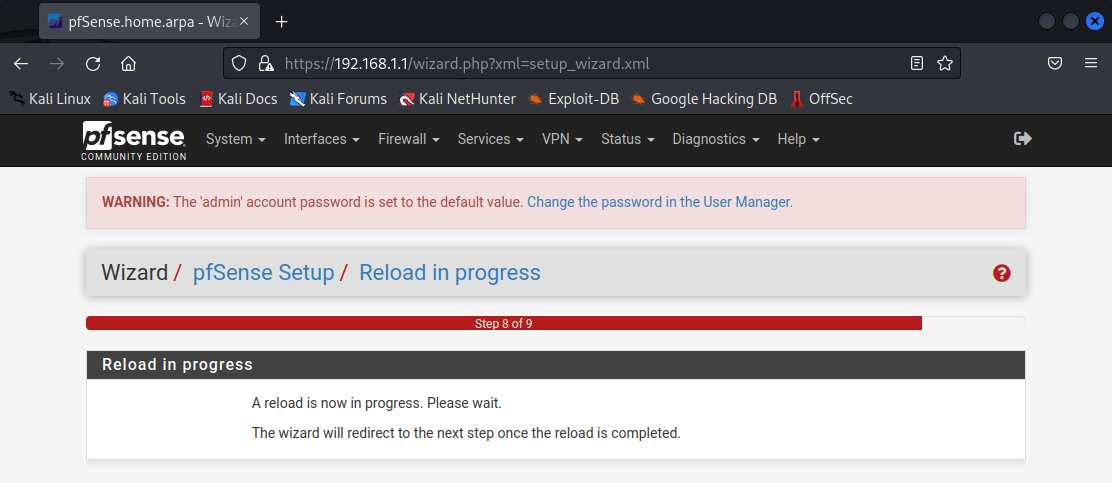
 The final step is to restart your pfSense VM. Allow it to do this and re-access web interface after a few seconds. You will be faced with the pfSense dashboard:
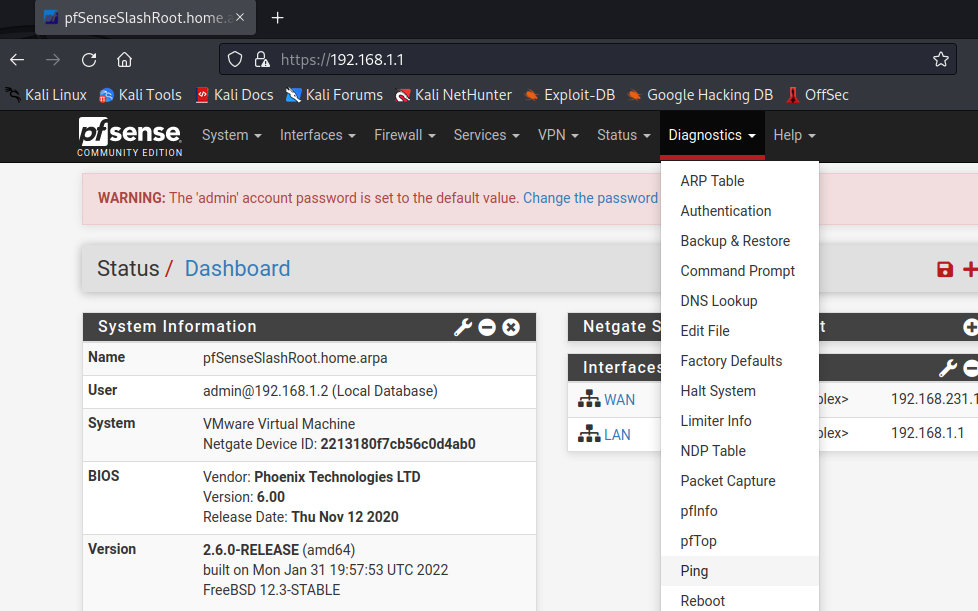
 The first check we are going to do is ensure the pfSense VM itself has working external connectivity (to the internet). Select Diagnostics > Ping.
 I have entered 'www.Quantum Repository.com' as a test hostname:
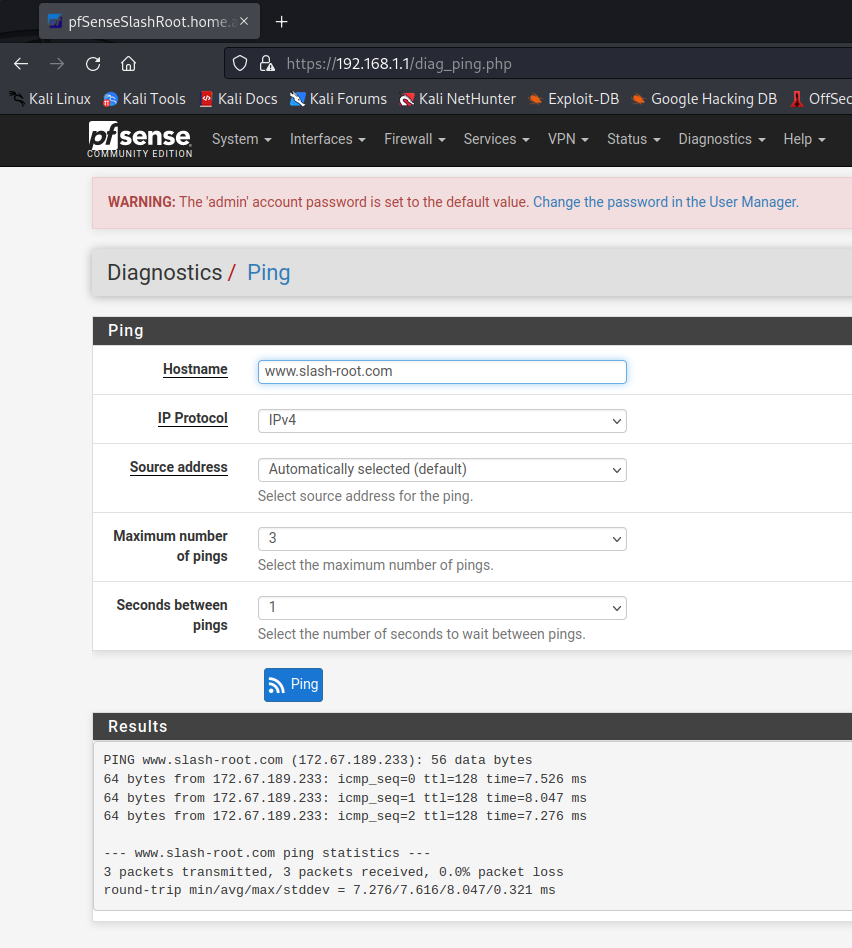 You will notice I am getting replies. This also tells me DNS is working from the pfSense VM to external. The lab is pretty much ready to go now, we just need to provide some services to our LAN side VMs.
Configuring services for the LAN
The service we are going to configure is DHCP. We will use this to give our LAN VMs an IP address as well as some network configuration information such as a default-gateway (DGW) and DNS. As we are not going to be configuring our pfSense VM as a fully fledged DNS server (we are simply going to forward DNS queries) we need to change a few settings. Select Services > DNS Resolver: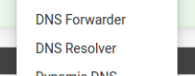
 Un-tick 'Enable DNS resolver', scroll to the bottom of the page and 'Save' (do not forget to 'Accept Changes'). Now access Sevices > DNS Forwarder and tick to enable. Scroll down to the interfaces setting and select the LAN interface:
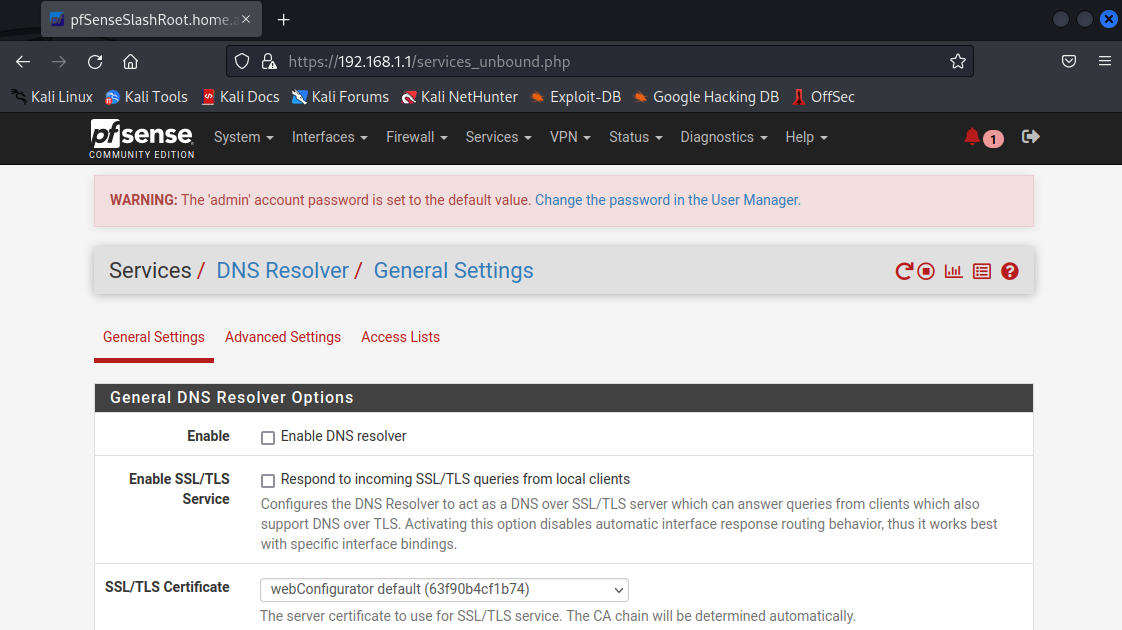
 We will now enable DHCP service and serve the LAN side DNS and DGW information. Select Services > DHCP Server. Tick to enable this (if it isn't aleady). Feel free to put in a range of IP addresses you wish to issue. I have just
selected the defaults (192.168.1.10 to 192.168.1.245):
We will now enable DHCP service and serve the LAN side DNS and DGW information. Select Services > DHCP Server. Tick to enable this (if it isn't aleady). Feel free to put in a range of IP addresses you wish to issue. I have just
selected the defaults (192.168.1.10 to 192.168.1.245):
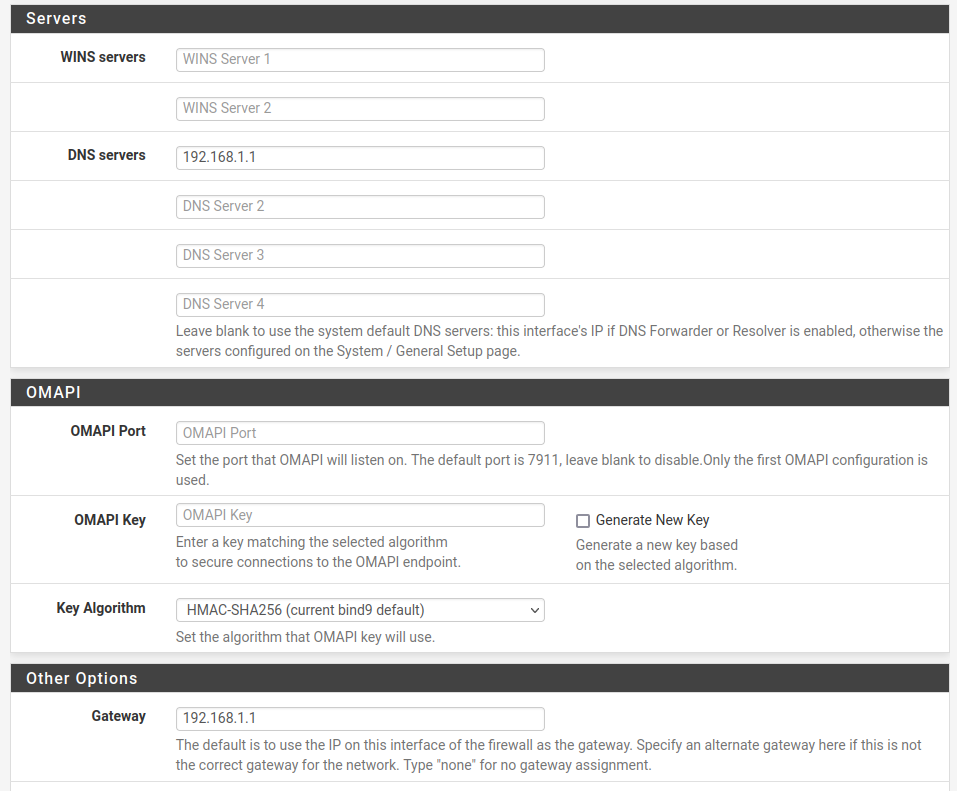
 Scroll down to 'DNS servers' and 'Gateway'. Enter the LAN side IP address of your pfSense VM, in my case this has not changed from the default, so I enter 192.168.1.1:
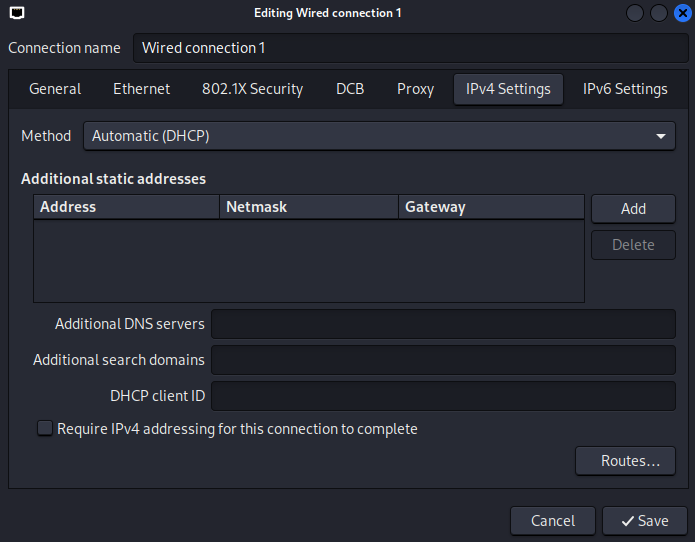
 Save and accept the settings. All going well we should now be able to give our LAN side VMs an IP address as well as a DNS server and DGW address. To check this, I will change my Kali VM to DHCP and then check what settings I have received:
 Don't forget to switch your Kali adapter off/on again to ensure it captures the change to DHCP. After a few moments, I check my network settings to see what I have received:
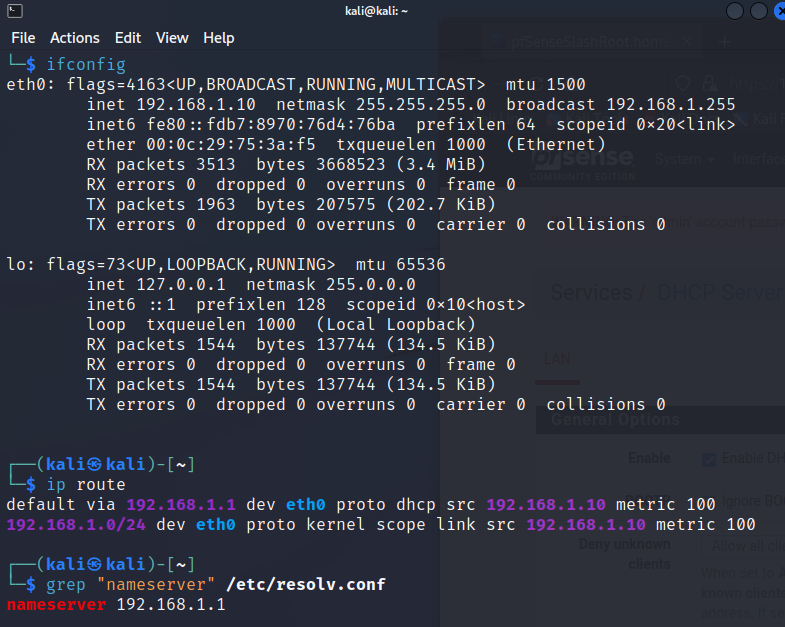 The IP address I was given by the pfSense DHCP service was 192.168.1.10 (that seems correct as this is where the range started), my DGW has been set to 192.168.1.1 (my pfSense LAN side interface) and my DNS server has been set to 192.168.1.1 (as we configured in the
DHCP offer options). The final check is to try and ping externally from my Kali VM:
The IP address I was given by the pfSense DHCP service was 192.168.1.10 (that seems correct as this is where the range started), my DGW has been set to 192.168.1.1 (my pfSense LAN side interface) and my DNS server has been set to 192.168.1.1 (as we configured in the
DHCP offer options). The final check is to try and ping externally from my Kali VM:
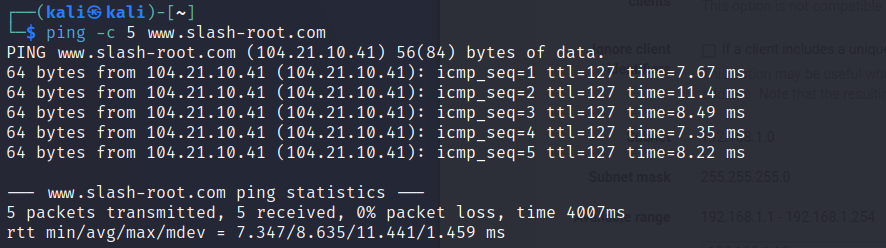 As exepected external connectivity has been achieved through my pfSense VM, you can now start adding addtional VMs (vulnerable machines etc) and placing them in 'VMnet1'. This was a very quick run through setting up a basic virtualised pfSense lab. I'd highly recommend you have a look through some (if not all!) of what pfSense has to offer as we've only just scratched
the surface here. It's a hugely powerful platform with hundreds of options of granular network control.
As exepected external connectivity has been achieved through my pfSense VM, you can now start adding addtional VMs (vulnerable machines etc) and placing them in 'VMnet1'. This was a very quick run through setting up a basic virtualised pfSense lab. I'd highly recommend you have a look through some (if not all!) of what pfSense has to offer as we've only just scratched
the surface here. It's a hugely powerful platform with hundreds of options of granular network control.